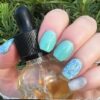
Something as simple as well-kept nails may make you appear more put-together, elegant, and classy. Colorfully manicured nails with elaborate patterns and designs directly reflect your personality and provide a sense of who you are. Some people like long, angular nails with dramatic patterns, whereas others prefer short nails with flowery or gentle motifs. It’s easy to say that nail design is swiftly acquiring followers all across the world, regardless of whatever end of the scale you fall on.
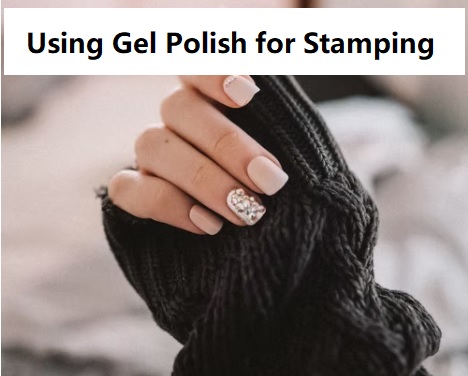
On the other hand, getting one’s nails done professionally isn’t always possible. It takes a long time and might cost you a lot of money. As a result, stamping your nails is a fantastic method of maintaining your nails in fun colors and trying out different designs. You’ll need something more besides your nail stamping kit to stamp your nails. You’ll also want a decent stamping polish to take your stamping to the next level.
Stamping With Gel Polish
“Can you stamp with gel polish?” is one of ladies’ most commonly asked queries. The solution is a little challenging to figure out. Yes, stamping nail art and gel polish may be combined, but can gel polish be used as a stamping polish? That is the most common question posed by women.
You must first understand what occurs when you stamp with gel polish to answer this question. The first issue you may have is obtaining a clean scratch—gel polish smears instead of scraping neatly since it doesn’t dry independently. If you’ve ever stamped with stamping polish or conventional lacquer, you know that a smear from any polish won’t always transfer to the stamper. Gel, however, is not one of them.
Even if you have a clean scratch, the fact that gel does not dry on its own will lead you to run into another problem. On the stamper, it tends to bead up. The lines drawn with a gel polish may seem thin, and the gel will pool in certain areas. The image on the stamper, on the other hand, will be considerably more robust and more defined if you use a stamping polish.
Next, transferring the gel image to a swatch stick that has been prepped with two coats of topcoat and the sticky layer removed may help keep the gel from spreading quite so much. Even if you roll the image onto the swatch stick or your nails with a very light touch – much lighter than what is essential for stamping polish – the result will be a faint and blurry design. Finally, using gel polish to stamp will not produce the intended results. While you may get the picture to transfer to the stamper and maybe to the nail, the end output will not be something you want to keep on your nails for more than a week.
Steps To Combine Stamping With Gel Polish
Combining stamping with gel paint for a beautiful manicure that lasts for weeks is ridiculously easy. Follow the instructions outlined below, and always remember to apply a thin coat of gel on your nails. Also, try to be as light-handed as possible when applying the gel.
- After appropriately applying the gel, cure it for the prescribed period. Apply a second coat, making it as thin as possible. After that, cure the nails one more time.
- Complete your gel manicure by removing the sticky layer. Do not use any oil.
- Get your stamping plate, stamper, and stamping polish ready.
- Stamp the picture straight onto the gel mani after it’s finished.
- Allow 5 minutes for the stamp to dry.
- Apply a topcoat layer, be sure to cover the stamp completely, and cure for 1 minute completely.
- Apply a second coat of topcoat to ensure that the stamp is thoroughly coated.
- Cleanser or 91% isopropyl alcohol can help remove the sticky coating.
- Use polish remover to get rid of the overstamp. You might also use an acetone-soaked cotton ball to wipe over the entire nail. This brief swipe will not harm your gel manicure. If you want to be safe, a non-acetone remover will suffice.
- Finally, don’t forget to moisturize!
There are two alternative methods to use gel with stamping.
- Before top coating, you can remove the sticky layer from the final color coat and stamp directly on it. Soaking off will be quicker than stamping over the top layer.
- You may use a regular nail polish top coat instead of a gel topcoat in steps 6 and 7 and clean up the same way you would if you were stamping over ordinary nail paint. It allows you to change your stamp without having to soak off your gel manicure. Use a non-acetone remover to erase the stamp and stamp again.
Conclusion
You could stamp with gel polish, but it isn’t particularly opaque, so choose a color that only requires one layer. Most gel polishes require two coats for complete coverage, which would be hard to achieve with a stamp. Make sure you remove the adhesive layer first, or your stamper will slip if you attempt it. The nails should be stamped over a conventional gel manicure to get the desired effect. Gel polishes are known for their long-lasting properties, so stamping over high-quality colors and finishing with a tremendously beautiful Gel Top Coat will help you keep that first-day shine for up to four weeks, or until your next mani refresh!
More Articles On Gel Nails:
- Are My Nails Extremely Short For Gel Nails?
- How To Dry Soak Off Gel Polish Without UV Light?
- Can You Dry Or Cure Gel Nail Polish With A Hair Dryer?
- How To Dry Soak Off Gel Polish?
- What Is UV LED Soak Off Gel Polish?
- What Is Soak Off Base Coat And Top Coat?
- How To Use Soak Off UV Gel Polish?
- What Is An UV LED Nail Lamp & How to Use it Correctly?
- Can You Use Any UV Light For Gel Nails?
- Can You Use Acrylic Paints On Gel Manicured Nails?
- Can You Use Black Light For Gel Nails?
- How To Dry Gel Nail Polish With LED Light?
- Is UV Light Necessary For Gel Nails?
- Right Way of Curing Gel Nails


