One of the most popular nail shapes is coffin nails. Thanks to celebrities such as Kylie Jenner, this shape has become the talk of the town in the last few months.
If you are looking for something fabulous and glamorous, coffin nails are the way to go.
But beginners face issues while shaping their nails – coffin because there are so many confusions out there with the steps.
Here in this article, we will focus on the simplest techniques of shaping coffin nails in just 3 simple steps.
Content
- What are coffin nails?
- How to do coffin acrylic nails in 3 easy steps?
- How to shape coffin nails on natural nails?
- How to Shape Coffin Nails with Polygel?
- How to shape coffin nails for beginners?
- How to Shape Coffin Nails on Short Natural Nails?
- How to Shape Short Coffin Nails?
What are Coffin nails?
Coffin nails look exactly like a coffin – these nails are flat at the tip and have a long shape. Ideally, your naturally long nails are perfect to get the coffin shape. But don’t fret if you can’t get your nails to grow that long.
You can always use acrylic or gel to increase the length and enhance the durability of your natural nails.
Given the immense popularity of these nails, it is natural to have a ton of questions about how to achieve the perfect coffin nails on natural nails and if it is possible to do this at home.
That’s why we have put together the most common queries about coffin nails. As a bonus, we will also tell you how to get coffin nails at home.
So without any further ado, let’s get started!
How to Do Coffin Nails in 3 Simple Steps for Acrylics?
You can make coffin-shaped nails in just 3 easy steps. In this section, I am covering the steps of making coffin nails with nail tips for acrylic application. You need a pair of scissors and an 80/100 grit hand file.
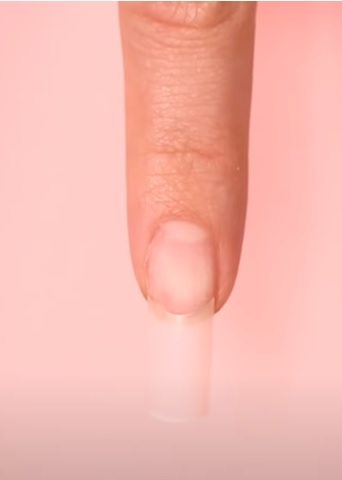
1. Preparing the Nail Tip:
Adhere the nail tip to your natural nail with an adhesive.
Let it dry for a minute and check back if it is attached properly.
2. Cutting Coffin Nails:
- Determine how much length you want your coffin nails to be – long or short! Hold the scissors horizontally and cut the tip.

Here is the result after cutting the tip.
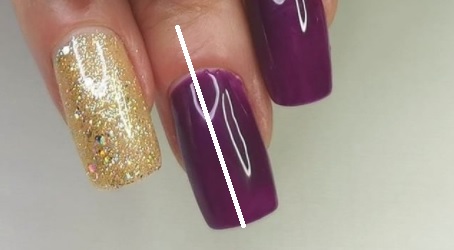
2. Now imagine a straight line at the center of the nail.

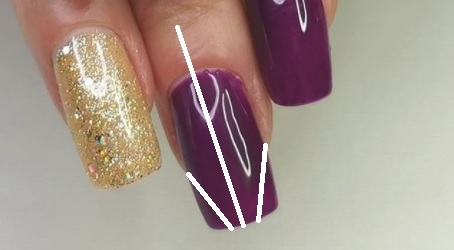
3. Imagine two perpendicular lines along with the straight line.
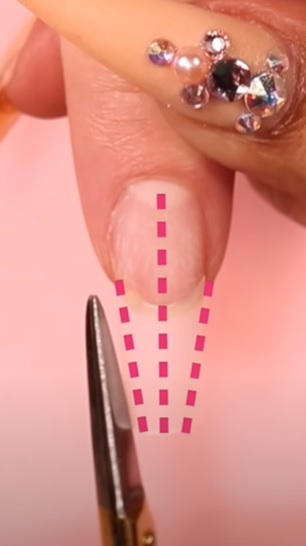
4. Cut through the perpendicular lines. Cut just a little bit.
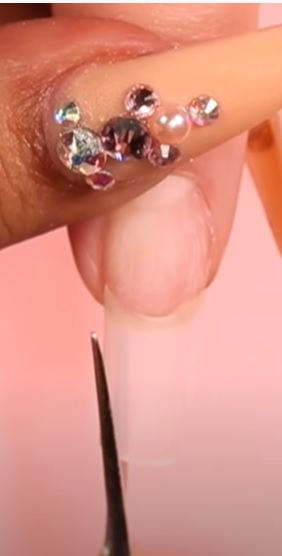
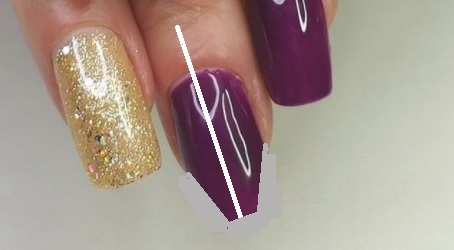
3. Shaping Nails Coffin by Filling:
- Now file the nail tip along the sidelines. Take it slow otherwise you run the risk of too much filling.
2. Try a different angle to file for better results.
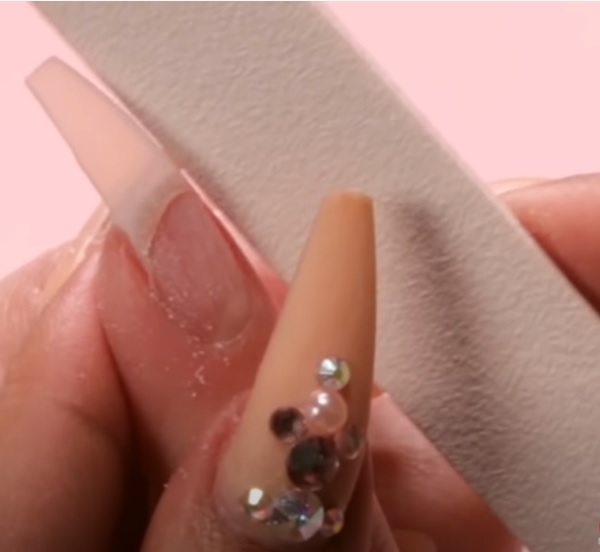
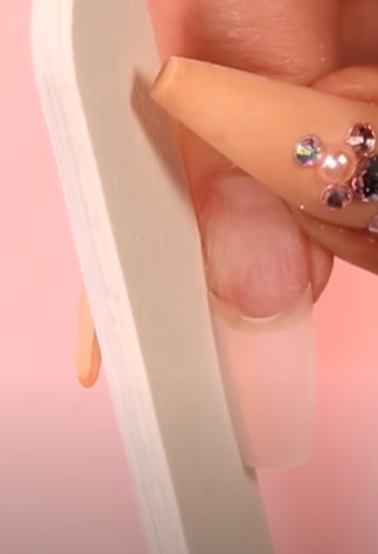
3. Don’t forget to buff the tip as well to make it flat as much as possible.
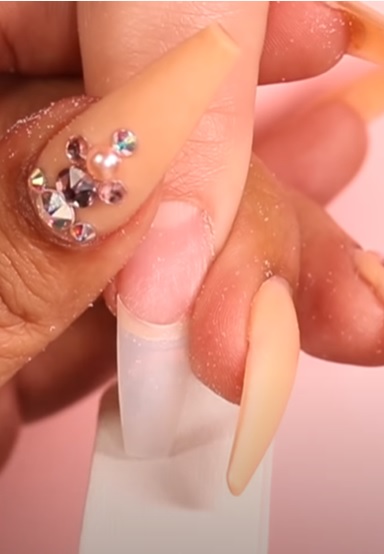
4. Finally, check if the sidewalls of your nails are flushed with the tip and formed a straight line for a clean coffin look.
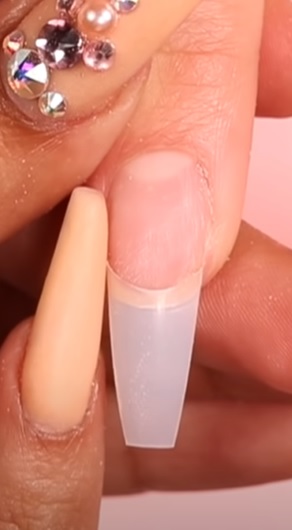
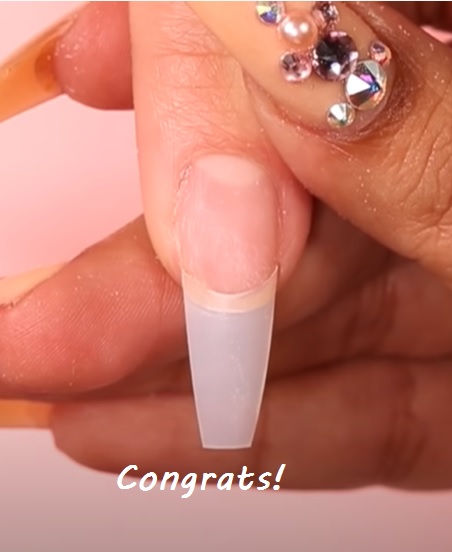
Here you have successfully filed your coffin nails.
How to Shape Coffin Nails On Natural Nails?

Getting a coffin nail shape on your natural nails is painless. You can either do it without the help of acrylic or use acrylic to increase the length and durability. If you want to skip acrylic, read our tutorial on how to get coffin-shaped nails naturally without messing up.
📌The biggest attraction of coffin-shaped nails is the flat tip. That’s why always start with achieving the perfect flat tip.
For that, you need to trim the side of your natural nails. And the flat tip will automatically emerge.

With fake nails, it becomes easier with scissors. But while dealing with natural nails please become extra careful and patient.
📌Coffin shaped nails have a slightly tilted edge. So what I do is – I cut both sides of my natural nails a little bit with a nail cutter. But keep my hands at an angle to get that tilt. And then use an emery board or nail file to file both of the sides even, until it looks like a coffin.
Word of Caution
Nail cutters are dangerous. One mistake and you can ruin your natural nails from becoming coffin-shaped. It happened a lot of times when I accidentally cut uneven sides and ruined the shape while trying to get it right.
For beginners, I will suggest being more patient and using a nail file to buff a little bit of portion from both sides of your natural nails once at a time till your get those tilts right.
📌Atlast, buff the flat tip to make it flatter. It gives the nail a finished look and your fingers appear longer.
- Be extra careful to not buff the nail along the innermost side of your nail. Otherwise, you will lose the coffin shape of your nails. Carefully trim the tip of the nail for a flatter look.
- Use a nail file to refine the shape of your nail. Simply follow along the natural curve to get the perfect shape for coffin nails.
- Once you are satisfied with the final shape, take a moist cotton pad and rub it carefully around the edges to remove the nail dust.
- Apply cuticle oil to give some extra TLC to your nails and massage it gently.
- Paint with a nail polish of your choice. Lastly, don’t forget to seal the polish with a generous helping of a top coat.
How to Shape Coffin Nails with Polygel?
Many manicurists consider polygel to be the best nail enhancement treatment available in the market right now. It is as flexible as a gel enhancement and durable as acrylic nails. Sculpting polygel nails to the desired shape is also easy.
Polygel is essentially an all-in-one formula that doesn’t require any mixing. Take it straight out of the tube and use it. It can be applied using a brush. The best feature is that polygel can be used on your natural nails directly or on nail forms.
Therefore, it is hardly surprising that polygel remains a top choice for many who want coffin nails.

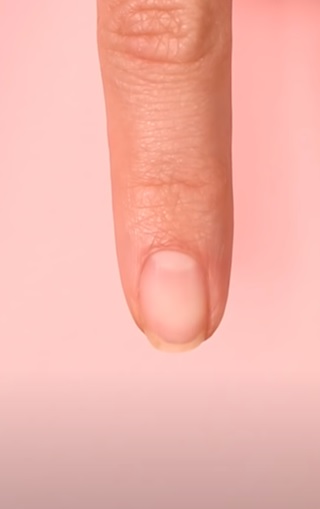
📌The first step involves prepping your nails for this treatment. You can start by pushing back the cuticles on your nail bed.
📌Next, use a buffer to go over the nails gently and remove the shine. Use a dehydrator to remove traces of moisture from your nails.
📌Start by applying a thin layer of base coat on your nails and cure it using a LED lamp.
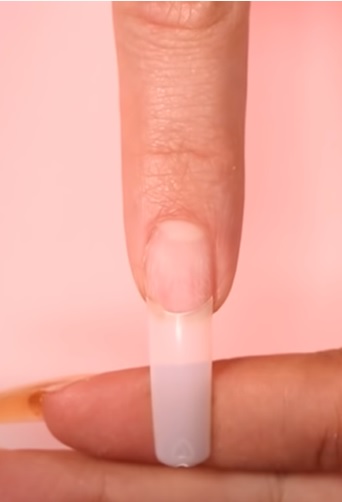
📌Pick the polygel shade you wish to apply. Take a small amount of the gel and apply it to the nail form. Gently press the nail form on your natural nails. Smoothen the underside using an acrylic brush.
📌Once this process is complete for all the nails, place them under an LED lamp for curing. Without curing, the polygel won’t set. So don’t miss this step.
After the curing, start shaping the Polygel nails coffin
📌Always start with buffing the sidewalls of your nails while there is a product on your nails. Imagine a straight line between your nails.
Then imagine two tilted lines from the tip of the nails to the end of the sidewalls. But both of the lines must be at an equal(approx. not mathematically correct) distance from the midline.
Use a buffing tool try to buff the extra nails after the two lines. Keep it slow and steady. Lastly, buff the edge of the tip to flatten it and get a polished coffin-shaped polygel nail. Apply the topcoat for the final finish and let it dry naturally.
How to Shape Coffin Nails Step by Step at Home for Beginners?
It is incredibly easy to achieve coffin nails at home. So follow this guide to learn how to shape coffin nails at home:

- Using nail polish, mark a tiny dot bang in the center of your nail. This will serve as a guide for clipping and shaping the nails.
- Slowly start clipping your nails to achieve a coffin shape. Don’t lose sight of the center and don’t cut the edges too narrowly. Otherwise, it will be a real challenge to shape them.
- Once you are happy with the shape, start filing the sidewalls of the nail. Be extremely gentle while you are filing. You don’t want to cause any accidental damage to your nails.
- Using the dot as a guide, gently move towards the center of the nail and continue filing on both sides. Make sure that the filing is even on both sides.
- Once you are happy with the tapered sides, use the nail clippers to cut straight across the tip.
- File the raw edge very carefully to achieve a flat tip. Maintain the sharp edges — otherwise, the coffin shape won’t pop.
- Once you have achieved the desired shape, apply a base coat evenly on the nail bed. If you are using gel polish, don’t forget to cure it under an LED lamp. Always seal the polish with a topcoat.
How to Shape Coffin Nails on Short Natural Nails?
If you desire elegant coffin nails but don’t want to put up with the length, there’s good news for you. Coffin nails can also work on short natural nails. Follow this simple tutorial to learn how to achieve this look for natural nails:

- Start by using a buffer. Buff the edge to push the cuticles back.
- Next, take a nail file and start by filing the tip of the nail. Keep filing gently till you achieve a flat tip. Do it in one direction to avoid any breakage. File it till you achieve a flat tip.
- Take the file and start shaping the corners of your nail. Don’t try to achieve a very sharp edge. Apply gentle pressure to achieve the desired shape on the edges.
- Repeat the process for all of the nails. Then use a cuticle remover and apply it around the edges of your nail. Use a cuticle pusher and apply gentle pressure to push the cuticle back.
- Apply very minimal pressure. Otherwise, you may end up damaging the nail bed. Wipe off the excess cuticle remover liquid using a soft tissue.
- Apply cuticle oil and let it dry. Use a buffer to smoothen the rough edges of your nail bed. Apply nail polish of your choice and let it dry naturally.
How to Shape Short Coffin Nails?

When it comes to coffin nails, you have the advantage of wearing them either long or short. If you have naturally short nails, simply use a nail filer to shape the edges. Use a nail clipper to get a flat tip on the nail.
Use a cuticle pusher to tame the cuticles and also massage a cuticle oil. Apply minimal pressure to keep the cuticles and nail damage-free.
If you want extra enhancement, you can go for acrylic nails and clip them short in a coffin shape. This will ensure that your nails are durable and strong to withstand external pressure.
Conclusion
Coffin nails are one of the trendiest nail trends that you can sport this festive season. So go ahead and experiment to your heart’s content. We are sure you won’t regret it!
More Articles On Nails Care:
- How To Use A Builder Gel On Natural Nails?
- How Much Is A Pedicure? – Complete Price Breakdown
- 8 Types Of Nail Extensions You Should Know About
- Best Nail Extensions For Short Bitten Nails
- How To Tell The Nail Tech What You Want?
- Does Kerasal Work?- Kerasal Nail Treatment Review
- What Is Monomer For Nails?
- Can You Use Any Nail Polish For Stamping?
- Can I Paint My Nails With Stamping Polish?
- What Kind Of Manicure Lasts The Longest?
- Can You Get Gel Nails Done On Short/Bitten Nails?