If you’ve been doing manicures for any duration of time, you’re aware that manually filing nails consumes a lot of effort and work.
Using an electronic nail file or drill, on the other hand, can make things easier and reduce your service time. Professional nail technicians should invest in a drill, and even if you’ve never used one before, try one immediately.
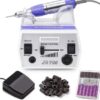
What Is An Electric Nail Drill?
The electric nail file is a high-tech item found in any salon or specialist nail store. They are not difficult to operate, and you can take one home and give yourself a professional manicure.
They do require some training and safety precautions before using. Electric nail files are helpful for more than just filing and shaping fake nails.
You can use an electric drill for various tasks, such as flattening roughness on the hands or feet, buffing the nails, cleaning beneath the free edge, sculpting natural nails, cleaning up rough cuticles, filling, and product removal more with the correct attachments.
This multifunctional tool is ideal for several service applications and is a must-have for professional nail technicians who rely on efficiency to stay in business.
What Does A Nail Drill Machine Do?
An electric nail drill is a tool nail professionals use to ramp up, streamline, or simplify specific nail procedures.
The electric file enables nail professionals to file or polish hard-to-reach nail regions, such as beneath the free edge of a freshly sculpted nail.
Electric files can improve a nail tech’s filing techniques by allowing you to form nails quicker, do more accurate backfills, and finely trim the cuticle region.
Electric drills used by suitably qualified personnel are entirely safe. More technicians also use electric files to improve fake acrylic, gel toenail treatments, and callus refining during pedicures.
Do You Need An Electric Nail Drill For Acrylics?
You should only use nail drills on acrylic surfaces, but with the proper training and perseverance, you can give yourself a perfect manicure from the comfort of home.
Acrylic nails don’t always necessitate the use of a nail drill. This tool’s goal is to eliminate oil and roughen the surface of your fingernail so that acrylics can attach correctly, which is beneficial.
You may achieve the same result by gently using a hand file without causing any harm or pain.
How Should You Use An Electric Nail Drill Yourself?
You can use a nail drill on the fingernails if you understand how to use it securely and manage different speeds. When working with natural nails, be sure to use a silicone sanding band or a diamond band. It is the most effective method for shaping and buffering your nails exactly the way you want them to be:
✔️First and foremost, press the cuticles back softly and carefully. Before using a drill, it’s vital to remove any dead skin.
✔️Keep your nail drill spinning around 2,500 and 6,000 RPMs when working on natural nails. Otherwise, you risk damaging or cracking the natural nail’s surface. Also, as you’re working, maintain the bit flat against the nail. While you’re working, keep your drill horizontal. You will have more control as a result of this.
✔️Then, in circular motions, slide the nail drill through one side of the nail to the other to remove dead skin and smooth them down.
✔️The next step is to buff your nails to keep them appearing shiny. The most pleasant, enjoyable, and relaxing part of the nail filling procedure is this stage. The procedure not only helps to keep your fingernails looking beautiful, but it also helps to revitalize the skin around your natural nails.
✔️Finally, apply a buffing cream to your natural nails before you begin. A cotton buffer should be present in your manicure kit, which you may place on the surface of the drill bit and run through your natural nails carefully.
Are Nail Drills Bad For Your Nails?
Because of the risk for harm, most specialists advise against using a drill on fingernails. However, if you know how to use a nail drill on natural nails correctly, you can avoid harm.
Drills produce a great deal of dust, which is a huge issue. When drilling, you should always wear a protective mask and have a decent ventilation table.
Breathing in any form of dust daily can be dangerous, but because drills are standard on intricately carved nails, the risk is significantly higher.
Asthma can be triggered by the acrylates used during sculptured nail systems, and these compounds can irritate the eyes and cause discomfort when inhaled as dust.
There’s no reason nail technicians can’t use drills, provided they take simple measures like wearing safety masks and glasses if they wear contact lenses and work at ventilated tables.
Is A Nail Drill Necessary?
Using a drill upon that nail bed is a frequent technique in less expensive nail salons, but it is unnecessary and causes far more damage than good – not to mention that it saves very little time.
The goal of filing your nail bed is to eliminate oil and roughen up the surface to attach the acrylics to the natural nail effectively.
However, you don’t have to use a drill to do this; a gentle hand file can achieve the same objectives without causing harm or irritation.
Why Do Nail Techs Drill Nails?
Nail technicians commonly use drills since they are quick heroes. They can reduce the time required to make a complete set of intricately carved nails by 15 to 30 minutes, and they can convert fills into a speedy service.
Some technicians believe that their drilling saved their careers by preventing carpal tunnel syndrome, a career-ending condition.
Most manicurists have been using drills for years and wouldn’t complete a set of sculptured nails without a drill.
A nail technician may do a fresh set of nails in 80 to 45 minutes; without one, it would require an hour and 25 minutes.
It’s an all-purpose instrument, according to nail technicians. You can use it to clean the nail, trim and smooth a tip’s ridge, form an acrylic overlay, and clean beneath the free edge.
Why Do Nail Drills Hurt?
The pressure of the bits on the nail might generate a burning feeling with electric drills.
Make sure you’re not moving back and forth with it; instead, proceed in one way, lifting the bits off the nail at the end of the stroke, and going to the side of the nail you started on.
Because you’re using sanding bands rather than carbide, you can be applying more pressure than you know. Carbides are harsher and require less pressure, whereas sanding bands require more.
Use an electric drill on yourself to determine how much pressure is required, and remind the client before you begin to let you know if they are uncomfortable.
They’ll appreciate it, and instead of waiting there to cope with it, they’ll tell you when they’re feeling something.
Is It Acceptable To File Top Of Nails?
The goal of filing the top of the nails is to eliminate oil and roughen up the surface so that the acrylics can attach to the natural nail effectively. You may also use white vinegar, rubbing alcohol, or polish remover—Buff the nail surface with the fine grit edge of the buffer to smooth it out. There’s no need to polish excessively, so limit this process to a bare minimum. Your nails will thin down if you buff them too much.
How Long Do Nail Drill Bits Last?
You must drill only fake nails with nail drill bits. Metal drill bits, except sanding bands, can survive hundreds of applications or up to six months of daily usage, providing that you use them on pretty soft materials rather than hardwood or metals.
Never use fingernail bits on more rigid materials than acrylics since they will wear out quicker and may bend out of balance if squeezed too firmly on the workpiece.
What Is A Brushless Nail Drill?
This type of electric nail drill has a brushless motor that is powered entirely by magnetic force. The brushless motor nail drill has ideal grips and tips that allow easy movement and maneuvering over the fingernails to obtain the required results.
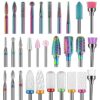
What Are The Different Drill Bits Used For Acrylic Nails?
Electric files can handle any filing requirement you may have. They may trim the free edge of the nails, adjust the contour of the nails, and prepare the manicure for a fill — all you need is the correct tool.
📌Football
It is used for filing under the nails. To go across the cuticle area, use a medium-grit football. The oval form of this device makes it perfect for working beneath long nails or removing old sculptural material around the cuticle while preparing for a fill. There are three grits to choose from coarse, moderate, and buffer. Balls help trim the cuticle’s edge or eliminate debris from the nail bed by going deep beneath the nail.
📌Mandrel
You must use bits with sanding bands are known as mandrels. These pieces heat up the fastest, and controlling the pressure is difficult. They’re great for getting rid of gels and sealants.
📌French Fill
For French fills, the tiny head diamond bur is utilized. The bur establishes two reference guidelines. It draws a new boundary between the white and pink acrylics, for starters. Second, it is a depth measure for removing white acrylics with a Coarse Barrel. The French fill drill bit helps trench the pink and white acrylic nails uniformly without producing early lifting or air in the middle.
📌Backfill
The shorter backfill pieces are meant to cut away only the white tips that have grown out, while the wider backfill bits can take out a greater area.
📌Cone
The cone is usually utilized beneath the nail. To clean the bottom of the sculptured nail, use the moderate or fine cone. You can use the cone beneath extremely short nails since it tapers downward almost to a point. Regular and half-size cones are available, as well as diamond and carbide.
📌Barrel
The barrel is mainly employed on the nail’s upper surface. A coarse or moderate barrel is used to grind away the previous sculpture material to prepare for fill or to form a newly sculptured nail. When applied with water or cuticle oil, an extra-fine barrel produces a matte pre-polish finish. When applied with water or cuticle oil, an excellent barrel produces a smooth, shining finish. A little barrel is a multipurpose tool that you may use on both the top and bottom of the nail.
How To Buy A Good Electric Nail Drill?
You won’t find a high-quality electric drill anywhere. If you discover one for a low price at a nearby shop, chances are it won’t perform well. Consider the following things before you waste your hard-earned cash on a drill that doesn’t perform the job or breaks after a short time.
- A drill with a speed of up to 15,000 RPM is typically sufficient if you want to use it mostly on natural nails. If you want to use it for acrylic nails or both natural and acrylic nails, use a drill with a minimum RPM of 25,000.
- Drilling for nails Bits is available in many different materials, sizes, lengths, and grades. Every bit has its own set of uses and functions.
- You won’t work quickly if it’s too heavy, and it won’t feel comfortable. After a long day of working with such a handpiece, your wrists and hands will suffer.
- Noise, vibration, and heat levels all impact the usage of filling and the precision of your job, and the dills’ lifespan.
- You’ll need to work backward and forth for manicures and refills. It enables you to operate in numerous directions without twisting your or your client’s fingers.
Top Electric Nail Drills To Buy
Invest in a nail drill if you don’t want to spend a lot of money on pedicures and manicures. Nail drills are available with several attachments, allowing them to do multiple tasks with one piece of equipment. Scroll down to see the top nail drills on the market.
Top Beginners Electric Nail Drills
Drilling Kit by Beautiful Nails

This 7-in-1 set includes all of the equipment you’ll need to do a pedicure and manicure at home. It has ten attachments and twenty sanding bands. You may use the gadget to file, buff, and shape your nails, as well as to smooth corns and calluses. An LED light for precise work illuminates the grooming area. Its ergonomic design lets you easily grip and use this nail drill. You’ll also receive a nylon case to keep the device in.
Pros:
- Design with ergonomics in mind
- Attachments with sapphire coating
- Rotation in both directions
- Simple to use
- Storage is simple
Cons:
- It doesn’t retain charge for very long
Nail Drill by LAYADO

Buffering, sharpening, grinding, sanding, nail art polishing, cuticle cleaning, and removing gel extensions are all possible with this versatile electric nail drill set. The gadget comes with a speed control button with speeds that range from 0-20,000 RPM. Furthermore, it has a robust and low-noise motor that spins in both forward and backward directions. The heat dissipation efficiency of the lightweight aluminum body is excellent. Its Universal Adapter Interface allows you to charge and plug your device in virtually any place.
Pros:
- Noise and vibration levels are low
- Compact
- Travel-friendly
- It is usable by either left or right-handed people
Cons:
- It shuts down several times when charging
Electric Nail Drill by Makartt

This electric nail drill kit includes 6 metal grinder nail bits and 6 sander bands for grinding, sanding, polish removal, and cuticle cleaning. The nail drill equipment has a rotatable button that enables smooth forward and backward motions. It has a variable speed range of 0 to 30000 RPM. The machine produces little noise and vibration and does not overheat.
Pros:
- It may be used on both natural and artificial nails
- Battery that lasts a long time
- Protective System Against Overload
- Travel-friendly
Cons:
- It may not last
Top Professional Electric Nail Drills
Sheen Electric – Nail Drill by MelodySusie

This electric nail drill by MelodySusie is an excellent option if you’re searching for a genuinely budget nail drill that will give you salon-quality results without breaking the bank. This device has a solid but quiet motor and intelligent heat dissipation to minimize overheating. This tool is small and light, making it convenient to transport.
Pros:
- Simple to use
- It doesn’t get too hot
- Portable
- Low-noise
Cons:
- Not usable for more than 20 minutes at a time
Nail Drilling Machine by Makartt

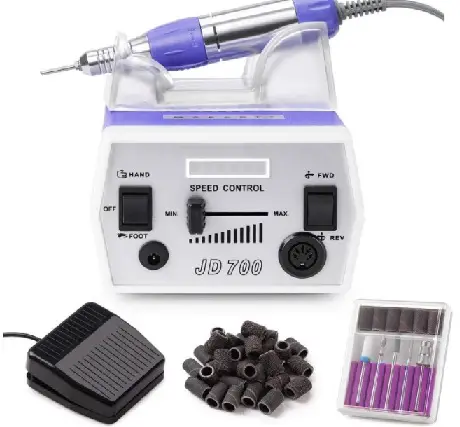
Once you own a Makartt Nail Drill Machine, switching among tools while completing a smooth job on your nails is simple! You can quickly alter the speed levels as per your preferences because the speed indication is shown on the motor. It also has a foot pedal feature when your hands are occupied. Select a setting that best suits your needs.
Pros:
- The motor is low-noise and vibration-free
- To avoid overheating, it is ventilated
- Both left and right-handed folks may use it
- Adjustable speed from 0 to 30000 RPM
Cons:
- The machine only operates for a short length of time.
Topic: Nail Essentials
- Choosing a Good UV Nail Lamp For Gel Nails
- Best At-Home Gel Nail Kit for Beginners
- How to Pick a Good Cuticle Oil for Nourished Nails?
- All About Best Polygel Slip Solution
- How to Buy an Efficient LED Nail Lamp For Lasting Gel Nails?
- Best Acrylic Powder And Monomer For Beginners
- Is 120w LED Nail Lamp Good?
- Top 7 Acrylic Nail Kits For Beginners


