I swear when I was a beginner I hated the idea of a new nail trend as every time I put the effort into learning a new technique soon another one becomes a noise.
There were no blogs to read or get a simplified answer. And one of the common questions that bugged me then for a very long period is the difference between Polygel and Builder gel.
There is still no well-simplified article to know the actual difference. Thankfully, I am now a nail tech and everything I learned about manicures and pedicures is from my own experience working in the industry.
So, in this article, I am going to drill down the difference – Polygel vs builder gel in very easy terms.
In Short difference: Polygel Vs Builder Gel
Polygel is thicker and stickier than builder gel and is typically more durable and stronger. Builder gel can be sculpted on your nails more simply because of its greater flexibility, whereas Polygel requires a slip solution to level and shape it. However, greater flexibility makes it more challenging to maintain control. So for beginners experts recommend Polygel rather than builder gel. Important to mention in this regard that the smooth application process of polygel depends highly on a good quality slip solution.
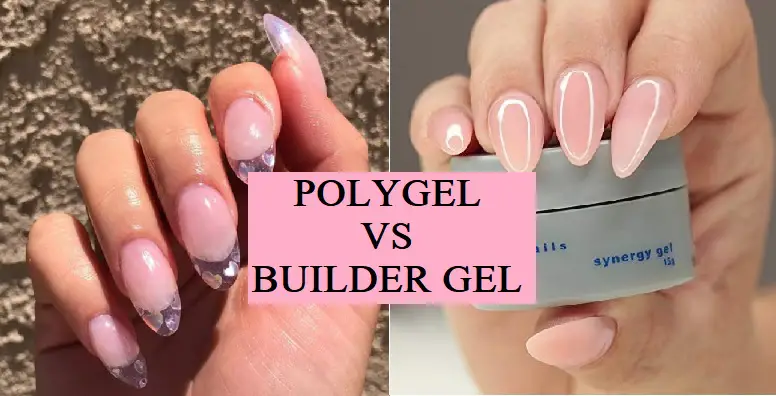
Differences and Similarities of Polygel and Builder Gel
What Exactly Is Builder Gel?

When you want to increase your nails’ length, thickness, or strength, you’ll apply a builder gel. You can use builder gel on natural nails to produce a non-chip overlay or nail tips to generate extensions or enhancements.
A good gel manicure may last up to four weeks, depending on the type you buy and how carefully you apply it, as well as how completely you remove the old coating.
A firm and healthy foundation is necessary when applied to natural nails. You must also use the proper LED or UV nail light for the appropriate period.
When the building gel starts to wear out, you can either infill it like acrylic or remove it and apply another set right away if the nail is already in good shape.
What Is Polygel?

Polygel is a new variant of gel composition that may mold robust and lighter nail extensions or make overlays.
It’s more durable and more rigid than typical gel polish, and it’s far easier to work with than sculpting hefty acrylic nails.
Polygel has a paste-like consistency to shape it with your Polygel brush, and it will stay put. It’s much thicker than conventional gel nail varnish or Builder Gel, and it won’t self-level so that you can create a beautiful arched apex for your manicure.
Polygel, unlike acrylic extensions, does not cure or dry when it comes in contact with air. It means you can sculpt your nails whenever you want before using an LED or UV lamp to cure them.
It also doesn’t have the artificial nail’s overbearing odor!
What Are The Similarities Between Builder Gel And Polygel?
- Both builder gel and Polygel can help improve or lengthen the natural nail.
- A nail lamp is required to cure both of them.
- A base coat and a top coat are necessary for both of them.
- You may use gel polish to apply both of them.
What’s The Difference Between Polygel And Builder Gel?
- Polygel is thicker and stickier than builder gel, indicating that builder gel is more flexible.
- Polygel is typically more durable and stronger than builder gel, even though various brands and correct prep and applications are the elements that determine the manicure’s longevity.
- Builder gel can be created more simply because of its greater flexibility, whereas Polygel requires a slip solution to level and shape it. However, greater flexibility makes it more challenging to maintain control.
- Polygel is significantly more straightforward to work with than building gel because you must apply numerous coats of building gel and cure between each layer if you want your nails to be strong and long enough.
- Polygel comes in a broader range of colors and styles than building gel, including glitter Polygel, thermal color-shifting Polygel, and so on. However, adding rhinestones or dried flowers to building gel is considerably easier than using Polygel.
- Builder gel must be removed with acetone, whereas you can remove Polygel more easily using electric nail drills.
Differences in there Application Process
What Is The Best Way To Apply Builder Gel?
The method you use builder gel depends on the brand you choose.
Some require a primer or base coat before application, while others may be applied directly to the nail for a faster result.
If you’re only using builder gel on your natural nail, it may be applied in a few layers and developed to the appropriate thickness and shape, curing in between each application.
Start applying your nail tip or shape before adding the gel and generating the length if you’re extending the nail. The general procedure for applying a builder gel is as follows:
- Prepare the nails by cleaning, filing, and buffing them. Push the cuticle back and trim it. Using a lint-free pad, wipe the nails with nail cleaner or acetone.
- Use a base coat or primer if your builder gel calls for it. If necessary, cure under a nail light. You may skip this and save time if you don’t require a primer.
- Apply the builder gel. You may paint it on if you’re using a packaged builder gel. If you have a container of gel, you’ll need to pick up a little quantity with your nail brush. Avoid the cuticle and make sure the free edge is covered. Allow for several seconds for the builder gel to ‘self-level,’ so be sure it’s applied evenly.
- Cure under an LED/UV lamp. The instructions for your selected builder gel should specify what sort of lamp to use and the time to cure it for.
- Apply a second layer if necessary and cure.
- To eliminate any tackiness, clean the nail with lint-free wipes and isopropyl alcohol.
- File the nails, polish the form you want, and smooth out any excessively thick places.
- Clean the fingernail again, then apply your color or topcoat. Paint the gel polish and cure it again if you want a different color.
- Your manicure is complete after all of your gel has been applied and fully cured. Apply a little cuticle oil and follow all aftercare instructions to ensure the manicure lasts.
What Is The Appropriate Way To Apply Polygel As An Overlay?
You can get all the products mentioned below in this single kit.

- With a Nail Prep and Polish Wipe, you may push the cuticles back, file, buff, and wash your nails.
- Cure for 1 min under an LED lamp or 2 mins under a UV lamp after applying a thin application of Polygel Base Coat.
- Take a tiny amount of Polygel from the tube and slice it using a Polygel Dual-Ended Tool.
- Apply the Polygel on the nail with a rolling motion.
- Use the brush side of the Polygel Dual-Ended Tool and a tiny amount of Slip Solution to pat the Polygel gently.
- Starting near the cuticle and working your way up the nail, pat the Polygel into place.
- Apply to all of the nails on your hand and cure for 30 seconds under an LED bulb or 2 mins under a UV lamp.
- Cleanse your nails and softly file the fingernail with a 180-grit file to level the surface.
- Continue using your preferred gel polish or apply Top Coat and cure.
Conclusion
Choosing either a builder gel or Polygel is frequently a matter of personal taste. However, for those who are new to nail art, experts recommend Polygel. You can mold Polygel quickly, whereas builder gel requires multiple layers.
You’ll need extra time and patience as a result of this. Furthermore, you may use several types of Polygel to create a stylish manicure design without the need for extra gel paint or nail embellishments.
Polygel is a more straightforward technique for a newbie to create their fingernails and gain confidence because of these two factors.
If you’re a seasoned home manicurist, choose your favorite product. Practice will make you perfect. Choose a beginner-friendly Polygel beginning kit for your first manicure kit, then practice until you’re a pro!
More Articles On Polygel:
- How To Do Polygel Nails With Tips?
- Drying Polygel Nails – Everything You Need To Learn
- Detailed Guide On Polygel Slip Solution Substitute
- How To Do Polygel Nails With Dual Forms?
- Can You Use Polygel Nails Without a UV Light?
- Can You Use Polygel On Bitten Nails?