Nail drills are unquestionably fast-action heroes. They can reduce the time needed to make a complete set of acrylic nails by 15 to 30 minutes, and they can convert fills into a speedy service.
While you may want to have your nails done as fast as possible, a substandard technic might lead to severe health problems. Nails are as valuable as your hair. So, like the maintenance of your hair, it is crucial to know what is a good technique and what is harmful to your nailbed.
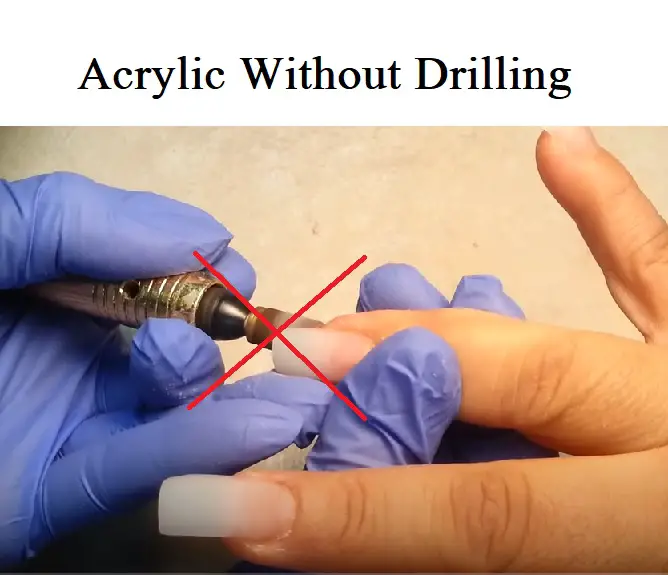
Let’s address acrylic nails and the most common query: “Why and how to avoid a drill while doing acrylic nails?”
Acrylic Nails and the Concern Regarding Nail Drill
Drills don’t produce a lot of noise or cost a lot of money. But still, people are skeptical about a drill and there are genuine reasons too.
Being a nail tech I understand the concern you might have regarding a nail drill. While some simply want to know the procedure without a drill because they don’t have one, others are afraid of the damages it might have on their nailbed.
Drilling your nails definitely is not natural. The main concern regarding nail drills is if you don’t know what you are doing you can easily injure your healthy nailbed. Going to an expert manicurist is thus always advised.
In case you want to do acrylic at home with a beginner’s kit, I will suggest you, to not use a drill. And below you will know how to do acrylic nails properly without a drill. But before that let’s talk about all the hazards for the user who is holding the nail drill.
It can be the technician or can be you who is trying to use a nail drill to do acrylics at home.
Effect Of Nail Drill On the User:
Drills produce a great deal of dust, which is a huge issue. Because the particles from high-speed drills are so tiny, people can easily ingest them.
If you file by hand, the particles will be between 100 and 1,000 microns in size. Grains in the 10 to 100-micron range, or even smaller, would be produced by a high-speed device.
The abraded material is far more prone to split into fragments of various sizes. Breathing in any form of dust daily can be dangerous, but because most technicians commonly use drills on acrylic nails, the risk is significantly higher.
Asthma can be triggered by the acrylates used in acrylic nail systems, and these compounds can irritate the eyes and cause discomfort when inhaled as dust. And that’s the reason why many customers at salons or DIY lovers at home avoid drill for doing acrylic nails.
What Experts Say on Doing Acrylics Without Drilling?
Drills can be dangerous to the health of professionals who use them, even though professionals may take safeguards to reduce the risk. Some drill critics argue that employing a drill detracts from the aesthetics of nail shaping and is unnecessary.
Few salons have set regulations regulating the usage of drills, while some advertise that they exclusively use natural nail systems or don’t use drills to attract customers. Drills may be used by technicians if necessary; however, specialists do not suggest them. Using carbide burs, which produce less dust than diamond pieces but need more expertise since they have tiny teeth that cut exceptionally rapidly, is one technique to reduce dust. As a result, conventional nail files are preferable over drills.
Does Avoiding Drilling Affect the Longevity of your Acrylic Nails?
Nail drills have many adversities, however, when there wasn’t much awareness, drills were very common at salons. What if doing acrylic without a drill easily break off the acrylic nails? Can you do acrylic without a drill or rather should you?
Salons use electric drills simply because it saves a lot of time. An electric drill can increase its customer handling capacity by 10x in a day. Whereas not using a drill hurts their business. So the only solution is they need to increase the charge per session if they stop using a drill.
Using a drill or not doesn’t have any relation with the longevity of acrylic nails. With proper technique and a hand file, you can easily make an acrylic overlay or extension long-lasting. Clearly, it is not necessary to use a drill while doing acrylic.
How to Avoid Hefty Manicure bills on “No Drill Salons”?
Manicures are always expensive. And “no drill salons” are extravagant. As I mentioned salons need to increase their session fee at least twice if they don’t use drills.
On the other hand, you can’t just use drills on your nails to keep the cost low. This is a dilemma. What I can suggest is a win-win situation for both the salon and you.
Buy a good quality acrylic kit and learn to do it without a drill like below. So, whenever there is a special occasion you can go to a salon for expert service on your nails, and in the meantime to maintain beautiful nails and try on different trends you can take the aid of a beginner’s kit and save a lot of money on manicures.
How To Do Acrylics At Home Without A Drill?
Remember, you want to make sure you prep your nails properly since if you don’t, your nails may lift, and you’ll have difficulties.
Acrylic nails are a new trend that allows you to create a wide range of gorgeous and sophisticated manicure patterns that are impossible to achieve with natural nails. You don’t want to speed the procedure and wind up tearing the acrylics off your nails, damaging your natural nails in the process.
Apply the mixture to your nail and work it in slowly until the entire nail is covered. Instead of using a drill, you may use a nail file. The only disadvantage is that the manicure would take about an hour plus 25 minutes to finish without the drill.
- Remove any previous nail polish with a high-quality polish remover and file the tips before a dip powder manicure. You can apply an extra 1 to 2 coats for a brighter color or a stronger nail. It is pretty simple for germs to colonize there.
- Apply a top coat once the colored coat has dried to preserve your nails. Apply a second layer for more extensive, stronger nails. You could use a buffer to eliminate any tiny fragments of acrylic that remain on the original nail after thoroughly washing the acrylics off.
- When you file down your natural nails, you’re filing down multiple layers of the nail bed, so take your time. On one side, file perfectly straight, then repeat on the other. Make sure you have the acrylic liquid, acrylic powder, a small jar or container, a synthetic brush, and some paper towels on hand.
- Smooth the region where your new nail growth meets the cuticle with a file. Simply rough up the acrylic using a coarse grit, such as 180, to attach the new acrylics to it.
- You may thin down your nails by polishing or filing away a portion of the nail’s surface to improve its look.
Conclusion
Whether you opt to use a drill or not, keep a lookout for cleaned and disinfected equipment from your technician. If anything makes you feel uneasy or causes you pain, speak out. Nail services should not be painful, and they must never leave your natural nails in an even worse condition than when you came for your appointment.